

Table of Contents
- Pre-Installation Site Assessment and Planning
- Selecting the Right Rack Enclosure and Equipment Sizing
- Rack Equipment Compatibility Verification
- Planning the Rack Layout Before Installation
- Server Rack Cable Management and Organization
- Rack Airflow Management and Thermal Optimization
- Step-by-Step Rack Enclosure Installation Procedure
- Commissioning and Post-Installation Verification
- Frequently Asked Questions
Last Updated: October 10, 2026
Pre-Installation Site Assessment and Planning
Rack enclosure installation requires careful planning before any equipment arrives on site.
Evaluate your facility's actual capacity before proceeding. The Rittal FR-IT 19" Series Server Racks support up to 1500 kg of static load capacity, but only if your floor can handle that weight. According to Standards Australia's structural design guidelines, floor integrity is paramount.

Measure access routes and doorways carefully. A fully assembled rack cannot navigate tight corridors or standard doorways. Verify your actual pathways and account for cable trays, PDUs, and existing infrastructure.
Confirm electrical infrastructure before ordering: available circuits, total amperage, and dedicated circuit requirements. Document your main electrical panel location, power distribution points, and facility limitations.
Evaluating floor condition and weight capacity
Your floor must be level, stable, and rated for the load. Uneven floors cause racks to shift, creating cable stress and equipment misalignment. Use a spirit level to check for slopes. If your floor slopes more than 5mm, you'll need adjustable feet or floor remediation work.
Weight distribution matters as much as total weight. Verify that each foot rests on solid flooring, not on empty space or cable trays beneath raised floors. This is a key consideration often overlooked in initial assessments.
Measuring clearance and access routes
Measure clearance from your intended rack location to walls, doorways, electrical panels, and cooling areas. Industry standard practice calls for at least 1 metre of clearance behind the rack for cable management and airflow, and 1 metre in front for equipment removal and maintenance access. This ensures adequate working space and prevents thermal issues.
Document measurements and compare them against your equipment specifications to ensure compatibility. A common pitfall is assuming standard doorway widths are sufficient for large enclosures.
Confirming electrical infrastructure and power distribution
Create a detailed electrical audit: total available amperage, circuit capacity, voltage, grounding location, and existing PDUs. If installing a UPS system, you'll need dedicated circuits and proper grounding. Treske's Rack & Stack UPS Service includes electrical infrastructure verification as part of the on-site assessment.
Document everything in writing and have your electrical contractor sign off before installation begins. This protects against future disputes and ensures compliance with Australian/New Zealand Standard for electrical installations (AS/NZS 3008).
Selecting the Right Rack Enclosure and Equipment Sizing
Choosing the right rack enclosure is a decision that affects your entire deployment. The wrong choice creates operational headaches that compound over years.
Rack unit (U) sizing is critical: 1U equals 44.45 mm of vertical height. Common sizes are 6U, 9U, 24U, 42U, and 48U. Most teams undersize by calculating only current needs. Plan for at least 30% growth headroom; if you need 28U today, buy a 42U cabinet.
Matching rack unit height to your deployment
Your deployment size determines whether you need a wall-mounted or floor-standing enclosure. This decision affects installation complexity, airflow management, and future scalability.
Wall-mounted enclosures (6U to 12U) suit edge deployments and space-constrained environments, supporting up to 113 kg. Floor-standing enclosures (24U to 48U) are standard for data centres, offering greater capacity, better airflow, and easier maintenance access.

Evaluating rack capacity and weight distribution
Calculate your total equipment weight by listing every device: servers, switches, PDUs, UPS systems, battery modules, and cable trays. Add 20% as a safety margin and compare against your rack's rated capacity. Exceeding capacity can lead to structural failure and equipment damage.
Place heavier equipment near the bottom of the rack and lighter equipment toward the top to maintain stability and airflow. This is a fundamental principle of safe rack installation.
Rack Equipment Compatibility Verification
Verify that every piece of equipment fits in your chosen rack. Most racks use 19-inch mounting rails, but some older equipment uses different widths. Check your equipment specifications against your rack's internal width.
Standard 19-inch racks have internal depths ranging from 600 mm to 1000 mm. Verify that deep equipment like UPS systems fits within your rack's depth. This is a crucial step to avoid costly returns or modifications.
Verify mounting requirements for each device. Some equipment uses standard brackets; others require custom adapters or special kits. Always consult the equipment's installation manual.
Create a compatibility checklist covering width, depth, height, mounting brackets, power connectors, and cooling requirements. Have your supplier verify this list before proceeding.
Planning the Rack Layout Before Installation
Your equipment layout determines whether your rack will operate efficiently or struggle with thermal and access problems for years.
Draw your rack vertically, marking each U position and listing every piece of equipment with its height and weight. Place heavy equipment at the bottom, light equipment at the top, and hot equipment (servers, power supplies) where they have clear airflow paths. A well-planned layout is the foundation of a stable and efficient rack.
Positioning heavier equipment near the bottom
Place UPS systems, battery modules, and heavy power distribution equipment in the bottom third of the rack to maintain stability and safety during maintenance. This practice significantly reduces the risk of tipping.
Position servers and storage in the middle section for clear airflow. Place network switches and patch panels in the upper third for accessibility and ergonomics. This tiered approach optimises weight distribution and accessibility.
Spacing equipment for maintenance access
Leave at least one empty U between major equipment sections for cable routing and airflow. Use blanking panels to fill unused U positions and direct airflow more efficiently. This prevents cable congestion and improves cooling.
Plan for cable management. If using cable trays or vertical cable organisers, account for the U space they occupy. Proper planning here prevents future access issues.
Server Rack Cable Management and Organization
Start with a cable routing plan. Use front-to-back separation: power cables along the back, network cables along the front. This reduces congestion and simplifies troubleshooting. A clean cable setup is vital for airflow and easy maintenance.
Routing cables along designated pathways
Designate specific pathways for different cable types. Route power cables from the PDU along the shortest practical path, avoiding coils that restrict airflow. Use cable management clips or trays to keep cables organised. Following designated pathways prevents accidental disconnections.
Schneider Electric NetShelter SX 42U Floor Standing Rack Cabinet for Blade →
Route network cables separately from power cables to reduce electromagnetic interference. Use Velcro straps for temporary bundles and cable ties for permanent installations; avoid zip ties as they can damage cables and are difficult to remove.
Labelling cables and equipment for future maintenance
Use a consistent labelling system combining location (e.g., "R1-U10") and function (e.g., "SRV-POWER"). Create labels that are easy to read and durable. Clear labelling is essential for quick identification during troubleshooting.
Label both ends of every cable using consistent terminology. Create a master documentation file showing rack layout, cable routing, equipment serial numbers, and warranty information. Keep it updated whenever you make changes. This documentation is invaluable for IT asset management.
Rack Airflow Management and Thermal Optimization
Proper airflow management prevents overheating. Most racks use front-to-back airflow: cool air enters through the front and exits through the back. This is a fundamental principle for maintaining optimal equipment operating temperatures.
Establishing front-to-back airflow patterns
Position equipment so intake fans face the front and exhaust fans face the back. Most standard 19-inch equipment is designed this way. Ensuring correct orientation is critical for effective cooling.
Document the airflow pattern for each device to ensure every piece contributes to front-to-back flow, not against it. Any device installed backwards can disrupt the entire rack's thermal strategy.
Installing blanking panels and managing intake air
Blanking panels fill empty U positions and prevent air bypass. Without them, cool air flows around equipment instead of through it, significantly reducing cooling efficiency.
Install blanking panels in every empty U position, especially between equipment sections. This forces air to flow through your equipment instead of around it. Research from the TIA (Telecommunications Industry Association) on rack and enclosure standards confirms the importance of blanking panels.
Monitor rack temperature regularly using temperature sensors. If temperature rises, check for missing blanking panels or blocked air vents. Proactive monitoring can prevent costly equipment failures.
Step-by-Step Rack Enclosure Installation Procedure
Installation is where planning becomes reality. Follow a systematic approach and you'll avoid the mistakes that create downtime and equipment damage.
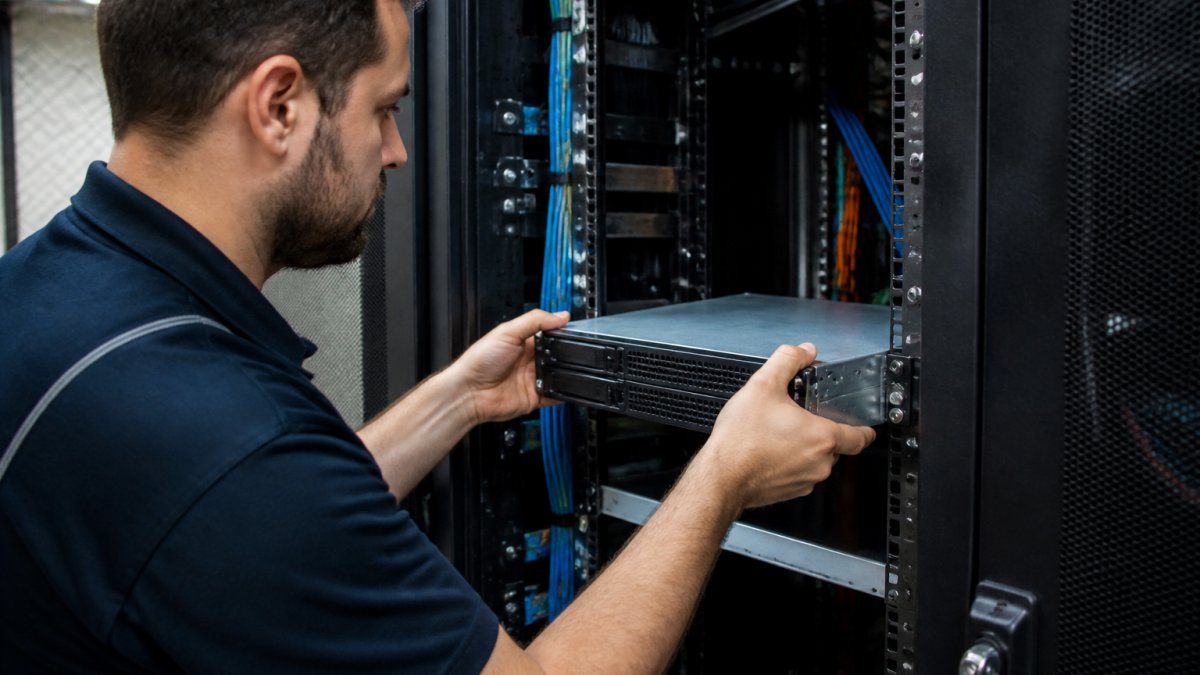
Unpacking and inspecting equipment
Unpack and inspect all equipment for damage before installation. Check against the packing list, verify serial numbers, and test power supplies. Document any damage with photographs and contact your supplier immediately if equipment is damaged. This initial check prevents installation of faulty hardware.
Installing mounting rails and securing the rack
Position your rack in its final location and level it front-to-back and side-to-side using a spirit level. Install mounting rails according to manufacturer specifications, ensuring they're at the same height on both sides. Tighten all fasteners securely. A level and stable rack is fundamental for equipment longevity.
Mounting equipment and establishing stability
Start from the bottom and work upward, installing heavier equipment first. For each device: align brackets with rails, slide into position, secure with fasteners, and verify it's level and secure before moving on. This methodical approach ensures stability and prevents accidents.
Connecting power and verifying grounding
Connect your PDU first, verifying it's properly grounded and bonded to the rack frame. Then connect each device using appropriate power cables. Before applying power, verify all connections are tight, cables are routed safely, and nothing could cause a short circuit. Turn on the PDU and verify all devices power up correctly. Proper grounding is a critical safety measure as outlined in AS/NZS 3008.
Commissioning and Post-Installation Verification
Commissioning is the final step before your rack goes into production. It's where you verify that everything works as planned before you depend on it.
Performing functional checks and load testing
Perform a comprehensive functional check: power on each device, verify it boots correctly, check network interfaces, and confirm monitoring interfaces respond. Then run a load test to verify equipment works under realistic load. Document all test results and create a baseline for future troubleshooting. This step ensures operational readiness.
Monitoring temperature and thermal performance
Install temperature sensors and monitor them for at least 24 hours under realistic load. Most data centre equipment performs best below 35°C. Consistent thermal monitoring is key to preventing performance degradation and failure.
Treske's Site Acceptance Testing service provides comprehensive verification of your installation, including thermal monitoring and load testing.
Create a monitoring routine. Check temperatures daily for the first week, then weekly for the first month. Establish a schedule for ongoing thermal performance checks.
*Visit us today to discuss your rack enclosure installation needs.
| Installation Phase | Key Focus | Common Mistake |
|---|---|---|
| Pre-installation | Floor capacity, electrical infrastructure, access routes | Skipping site assessment |
| Equipment selection | Rack sizing, capacity planning, compatibility | Undersizing for future growth |
| Layout planning | Weight distribution, airflow paths, cable routing | Cramming equipment too tightly |
| Installation | Rail alignment, secure mounting, proper grounding | Rushing fastener tightening |
| Commissioning | Load testing, thermal verification, documentation | Skipping functional checks |
Further reading on critical infrastructure:
According to Standards Australia's data centre design guidelines, proper thermal management and equipment layout are essential for reliable data centre operations.
Research from the TIA (Telecommunications Industry Association) on rack and enclosure standards confirms that front-to-back airflow patterns and blanking panel usage significantly reduce thermal stress on equipment.
The Australian/New Zealand Standard for electrical installations (AS/NZS 3008) specifies grounding and bonding requirements for data centre power systems, which directly affects safe rack enclosure installation.
Frequently Asked Questions
What should you check before installing a server rack?
Before installation, verify floor load capacity to support the fully populated rack weight, measure clearance around the rack for airflow and maintenance access (typically 300 mm on sides and front), confirm electrical capacity and grounding infrastructure, inspect the installation site for level flooring, and ensure doorways and access routes accommodate the rack dimensions. Document these findings in your pre-installation assessment.
How do you verify rack equipment compatibility?
Check that all equipment uses standard 19-inch mounting rails matching your rack width. Verify rack unit (U) heights match your enclosure capacity. Confirm power requirements align with your PDU and UPS capacity. Review manufacturer specifications for depth, weight, and thermal output. Test equipment connections before final installation. Mixed-generation equipment can coexist if electrical and thermal requirements are met and documented.
What are the best practices for server rack cable management?
Route cables along designated pathways using cable trays or organizers. Secure cables with Velcro ties to prevent tangling and damage. Label every cable at both ends with clear, consistent naming conventions. Avoid routing cables across airflow paths. Maintain separation between power and data cables where possible. Plan for future expansion by leaving slack and routing cables to allow equipment changes without full reconfiguration.
How do you manage airflow in a rack enclosure?
Establish front-to-back airflow by placing equipment intake ports facing the front and exhaust ports toward the back. Install blanking panels in empty rack units to prevent hot air recirculation. Position intake air pathways at the bottom and exhaust at the top. Monitor inlet and exhaust temperatures during operation. For high-density deployments, consider enclosures with integrated cooling. Avoid mixing hot and cold aisles unless your facility layout requires it.